Wednesday, 21 February 2018

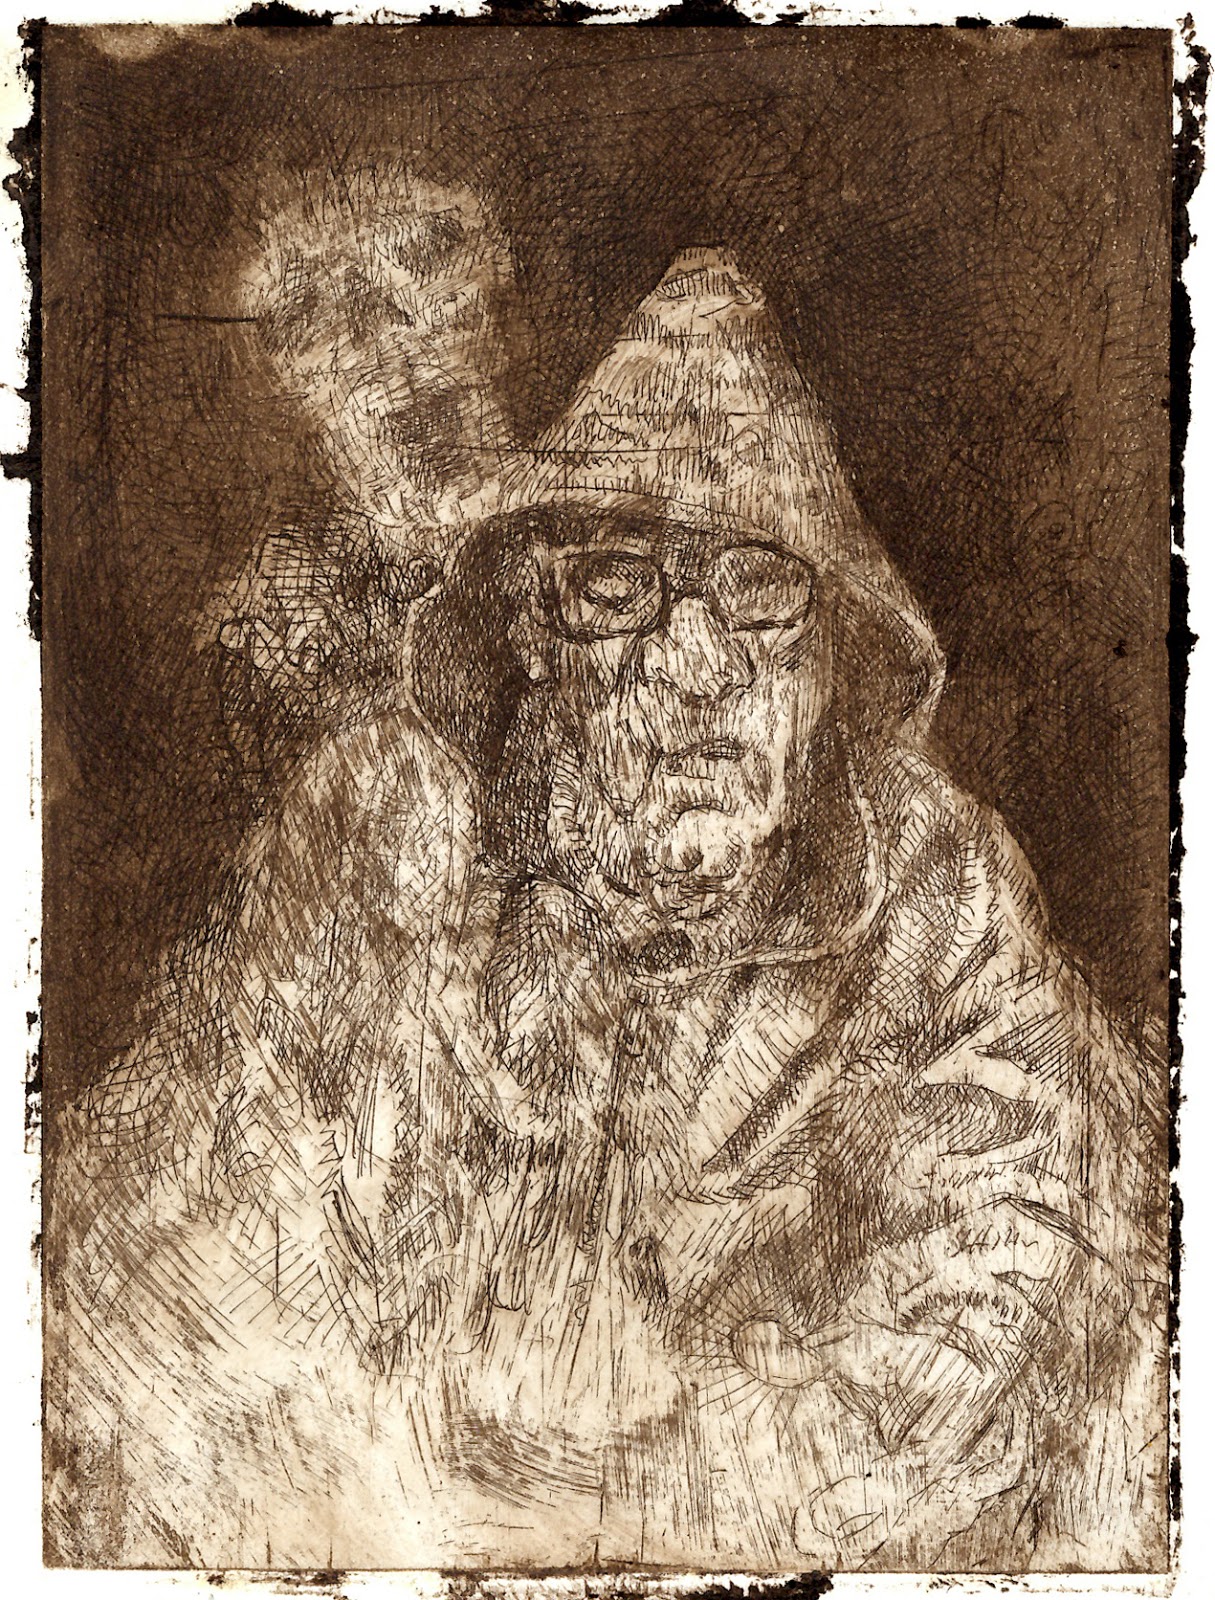
Death on the Bus, etching

I have learned a lot in Cameron's etching class. As well as my own faltering attempts between classes. By doing it wrong, I learned:

  • For dark areas it is better to do more layers of cross-hatching than it is to do finer hatching.
  • Differing depths of bite can be used in combination to good effect
  • ALWAYS use your own bottle of Nitric acid & don't ever let ANYONE else use it! (the difference in strength, from what I saw, can vary by as much as 75%. If you're grabbing a bottle at random from the print shop you don't know how depleted, or strong, it is.)
  • Now that I have done my first steel plate etching I have one reason at least, to favour copper. Mistakes, or gradations, can be introduced with a burnisher & scraper more easily on the softer metal. The steel also has a stronger plate tone, since it isn't as smooth as copper, which can be an advantage or disadvantage, depending on your aim. I realised that, for instance, if you were to burnish only the highlights, you would get spots that were more white (paper coloured) than the general background tone. That is to say, you would have the option of creating a three tone print. Dark in the etched areas. Medium background tone. Light in the burnished areas.
The first proof of my first steel plate was promising.


When pulling the second proof, however, it suffered foul bite throughout when I left it in acid that was stronger than I expected. I tried to bring back some of the contrast with several hours of wrist-breaking scraping, burnishing & drypoint, & I think, the general effect is not bad--if only it weren't so dark overall that it doesn't invite examination. I did a pen drawing of this subject, too (pictured in the post beneath this one) from my imagination. I like the subject well enough that I will try one more etching on a new plate.


Finally finished my third treatment of 'Death on the Bus', etching on copper. 2nd plate, 5th proof


Here they are together. The original photo:


The pen drawing:


And the painting on copper:


Thursday, 15 February 2018

Tuesday, 6 February 2018

Sculpture Painting

A new idea. I have made these small maquetes with the idea that they could be constructed life-size Out of plywood boxes. I am calling them 'sculpture paintings' until something less inelegant occurs to me.


Saturday, 3 February 2018

Big Brill

Big Brill fish. I'm not sure how I will finish this yet but it is fired & ready for me to come up with some idea. 60 cm width


Friday, 2 February 2018

Death on the bus

I did the pen drawing, below (22nd of January), from this photograph I took on a bus


I have been working on an etching of it. Here three states


Cameron Ross has been giving me etching lessons on his own time (thanks Cameron!). He showed me how to do aquatint with acrylic spray. I wanted velvety darks in the background, but, though I was glad to learn the technique the darks went too far & there was no saving the etching.


I bought new copper to try again, & used the ruined plate to try out the new Daler Rowney, FW acrylics. I discovered them watching the fine illustrator, Scott M Fischer's videos of his process for painting on copper.


Friday, 26 January 2018

The Saga of Darwin's Fish

This project, begun so thoughtlessly, after weeks of preparation, has finally been poured in glass. Today, after a three day burn in the kiln & another for cooling down, I removed the one-time mold.

It all began with a simple plaster-cast of a fish, a Sea Bass. Which I thought would be a quick, first-time experience in glass casting.


The mold was good, the detail clear. But it took a few attempts at filling it with Paraffin, before getting a cast with all the details of fins & tail. In the end, I made trenches in the mold from all the high points of the fins & tail, to allow the air to escape, before I was able to force the wax in all the nooks & crannies


I modelled arms & legs in clay


Made a mold for each of them


Once poured in wax, & with great difficulty, I attached the wax arms & legs to the fish. Unfortunately the process was so fraught, & the resulting wax fish so fragile, that I didn't get another photo of it until it was in the container made to hold the plaster, flint & fiberglass I would pour into it. The metal rods are sprues that are removed after the plaster sets leaving vents for the air to escape.


In the kiln after the pour. You can see the convex shape of the glass that has filled the hole on top (the fish is upside-down, we see its base)


I began to chip the mold away. Carefully, to avoid breaking an arm or leg by accident.


When I reached a certain point, however, it fell away to reveal a fish-shaped hole where the molten glass should have been.


When I got all the mold broken away, I revealed the only part that had filled. Eeek! The pedestal & a foot :-(


I bought some expensive glass, which I'm told will work better. I have all the molds, so I will begin again from scratch

Monday, 22 January 2018

Saturday, 20 January 2018

Friday, 19 January 2018

Sculpture

I finally finished this sculpture. Here, its final stages


I then burned it with a torch in Phil's workshop


The following day, I changed my mind & charred it until it was completely black


After burning, I burnished it with a soft wire brush followed by a softer bristle, & then I gave it a coat of linseed oil. I am pleased with the soft, mysterious, deep finish. It is a shame the sculpture itself isn't very accomplished. The Yew wood simply wasn't up to being carved--by the end it was chipping off in such large pieces that I decided to leave it rough rather than take a chance of losing a whole foot or something. But, overall, I am happy with the experiment & don't regret the time I put into it. I will be going back to buy some Maple or Oak to try another

25/01 After a second coat of Linseed oil dried, I treated it with a coat of French polish giving it a subtle sheen


Life drawing at Food Story. Pregnant model


Tuesday, 12 December 2017

Vase 2nd stage

I glazed the interior of the vase & it has finally come out of the kiln after this, its second firing. The lid is back on the shelf waiting for its third firing with the gold lustre I bought & applied to its rim. In the meanwhile I have begun painting the vase with a background to the final design.


Now (Dec 15), with lid. Glazed, gold lustered, & painted in the same French Ultramarine as the vase's base


Friday, 8 December 2017

Almost there

Another session or two & I will be able to finish this piece as planned, before Christmas

Boxes gb05

Moved the boxes from Malcolm's to gb05 yesterday. I photographed them, then I cut them up with Photoshop so that I could try different ...